| Table of Contents |
|---|
From a paper or email request
If you have a request submitted by paper or email, and want to process that request in OpenBoxes, first go to "Outbound">"Create Outbound stock movement"
...
This will bring up first page of the stock movement work flow. On this page, you can provide the basic information about your stock movement:
...
Note that the origin of the stock movement has already been prefilled for me. Because I was logged into Rwinkwavu Pharmacy Warehouse, and I created an outbound stock movement, Openboxes knows that my origin should be Rwinkwavu pharmacy warehouse.
Here is a guide to the remaining fields:
Description: Put a description of the shipment that will help you remember what it is. It could be anything - PO number, description of items - whatever is meaningful to you
Origin: The place where the shipment is coming from. For an outbound shipment, this will autofill to your current location
Destination: The destination is where the shipment is going to. If you start typing the name of the receiving location, it should appear in the dropdown menu. If it does not, you will have to create the location
Requested by: The person who requested the goods in the shipment. If there is no specific requestor, you can choose to put someone else who is important to the shipment (creator, person who placed the PO, etc). If the requestor is not in the system, you will have to create a person
Date requested: The date the request for these items was made. If there was no specific request date, you could use the date the PO was placed or the date shipped.
Request Type: Choose either stock or ad hoc. Stock means a regularly scheduled request . Ad hoc is something that came up outside the normal replenishment cycle.
Stock list: Leave this field blank unless you are creating shipment from a stock list.
Once you have filled out all of the required fields, press next to go to the next page
...
On this page, you can add all of the items and quantities requested. Find a product to add to your shipment by searching either the name or the product code in the item dropdown. Select the product you want from the list that appears. Add a quantity for each item. You also have the option to add a recipient to the line. Recipients indicate if an item needs to be issued to a particular person or department.
Once you have finished with one line, you can add a new line by clicking the "add line" button at the top left of the table.
Once you have added all of your items to the shipment, press next to move to the next page
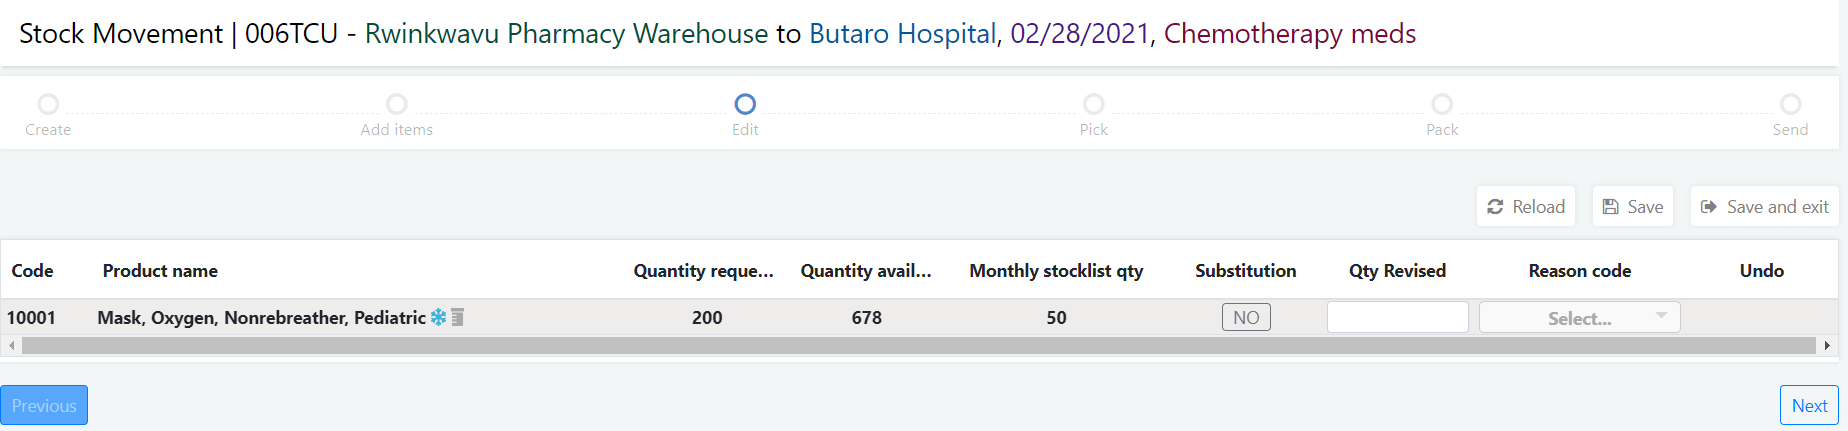
This page shows you the quantity that was requested vs. the quantity you have available in stock. If all of the items that you requested are in stock, the page looks like above. You can see that the quantity available column is all black. If there were too little qty available, the numbers would be highlighted in red. If you page has no red, simply press next. If you see red, or you see "earlier" in the substitution column, go to Edit items in a stock movement.
The next page is the "Pick" page:
...
Openboxes will automatically generate the lots and bins to pick from. The system will automatically suggest the first expiring lot. Given the same expiration date, the system will choose to pick from the bin with the smallest quantity first.
Review the pick to make sure it matches your expectations. If you have to edit the pick for any item, you can do so by clicking the edit button.
Once you have verified that all of the lots and bins are correct, press next to go to the next page. Depending on your location’s settings, this will be the pack page or the send page. If the pack page is not enabled in your location, simply skip down to the send page in these instructions.
...
On the pack page, you can add information about how the shipment is packed. Pack level 1 and pack level 2 are free text fields where you can add information about the containers for the shipment. If one item is split between two boxes, you can press the split line button to indicate the quantities in each box. Once you have your packing information entered, press next
...
The final page shows a summary of your shipment. Review the details of the shipment to be sure they are correct. If you find errors, you can press previous to go back and make changes.
After you have reviewed the information, choose your shipment date and shipment type. Shipment date defaults to the current time. Only change it if you are entering a shipment that happened in the past. For shipment type, choose between land, sea, air, and suitcase. You also have the option to add a tracking no (this could be an AWB, BOL# container no, or other useful tracking code). If appropriate, you can put the name of the driver for reference. And finally, you have the option to leave a comment.
Using the buttons on the top right, you can download an automatically generated packing list and delivery note from this page. You also have the option to upload documents related to the shipment.
Once you have entered each field and verified that the information is correct, press "send shipment." Your shipment has now been sent and the items have been removed from inventory. You will be redirected to the shipment view page, where you can see the details of the shipment, including the new status, "shipped."
From a paper or email request - with a stocklist
...
This sections covers all of the ways to ship stock from your depot.
| Page Tree | ||
|---|---|---|
|