 Introduction
Locations are one of the most important building blocks of OpenBoxes. They are used to track where stock came from, where it is, and where it went. There are several different types of locations in Openboxes:
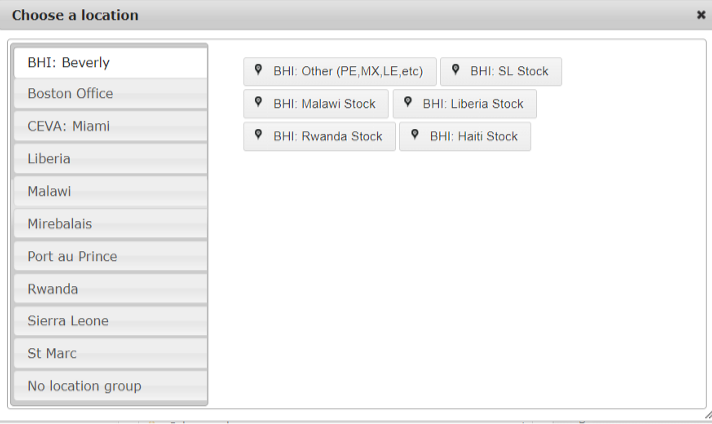
Depot: A depot is a location that can manage stock within Openboxes. Any location that you can enter and see the dashboard is a depot. All of the location in the opening menu are depots:
You should create a location as a depot if, and only if, you have a user who will be actively managing the inventory in that depot. If you will not be managing inventory in that location in OpenBoxes, choose one of the following location types.
Supplier: A supplier is a location that exists only to send stock to other locations. Suppliers do not have a dashboard or inventory. You should create a supplier location to reflect every location that is sending stock to your warehouses, but is not a depot. Usually, a supplier in openboxes is also a supplier in real life, for example Amazon.com. However, any location that is sending stock but not managing stock in Openboxes can be a "supplier" in the system.
Dispensary/Ward/Pharmacy: These locations are essentially interchangeable. All exist only to receive stock from Depots. Any location to which you will be sending stock, but not actively receiving or managing inventory in Openboxes, should be created as a ward, dispensary, or pharmacy
👁 View and Search Locations
✏ Create and Edit Locations
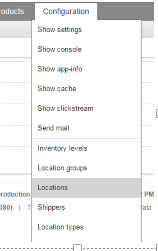
Hover over Configuration and click “locations”.
On the new screen that appears, click “Create location”.
The new location screen will appear as follows:
Name: Write in the name of the new location
Example: Lisungwi Dispensary 1
Location Type: Choose depot, supplier, ward, dispensary, or pharmacy.
Example: Dispensary
Location group: Choose which location group you want it to fall under
Example: Lisungwi
Manager: Choose an OB to act as manager of the location. Not required.
Example: Laura Gould
Background color/ Foreground color: allows you to edit the color that appears on the screen. Not required.
Sort Order: Not required.
Status- Properties: Select whether or not the location is active or inactive, managed locally or remotely.
Status- Supported activities: Select the functionality of the location. In most cases, you will choose “default settings” which will allow the location full functionality.
Note: If you need to select multiple supported activities hold down “CTRL” and “ALT” at the same time and click all relevant entries.
Address: If helpful you can put in the address information for the OB location. Not required.
Once all settings have been determined, click “save”. Your new location is now registered.