Clicking Deploy to Azure button will bring you to Azure portal, where after filling a few of the properties you can get your OpenBoxes environment in a matter of minutes. It uses the Azure ARM template which is contained in openboxes-devops Github repo.
The Azure resources being provisioned by the deployment are shown on the diagram Diagram of deployment Azure resources .
Prerequisite:
Microsoft Azure account is created
If you’d like to deploy Open Boxes to Azure VM accessible with SSH Public Key, you need to have key-pair created. You can follow https://docs.microsoft.com/en-us/azure/virtual-machines/linux/mac-create-ssh-keys
Notes:
At this point there is no managed MySQL instance ( Azure Database for MySQL ) being created Azure Database for MySQL instance being triggered
Step-by-step instructions:
Follow the video to create an account on Microsoft Azure:
https://www.youtube.com/watch?v=t-SgKyWLxscClick on the Deploy to Azure button.
This will bring you to the Microsoft Azure where you need to log in with your account.
Once you log-in you’ll see the the configuration screen. Look at each property's tooltip description to understand its purpose.
Some of the fields have sane defaults, which don’t need to be changed.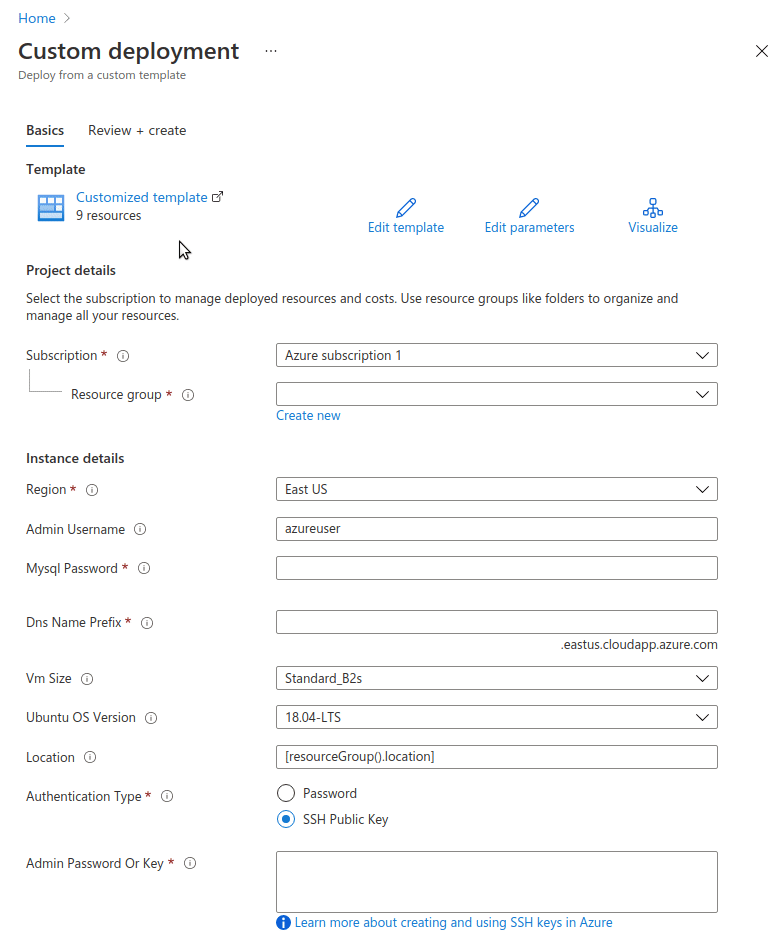
Fill in the parameters according to the tooltips description.
In Authentication Type field you can choose between Password and SSH Public Key authentication.
Password enables you to SSH into the Azure VM instance with user and password pair.
If you’d like to use SSH Public Key option, you’ll need to create and paste it in the text box.
Follow guide to create SSH keys:
https://docs.microsoft.com/en-us/azure/virtual-machines/linux/mac-create-ssh-keys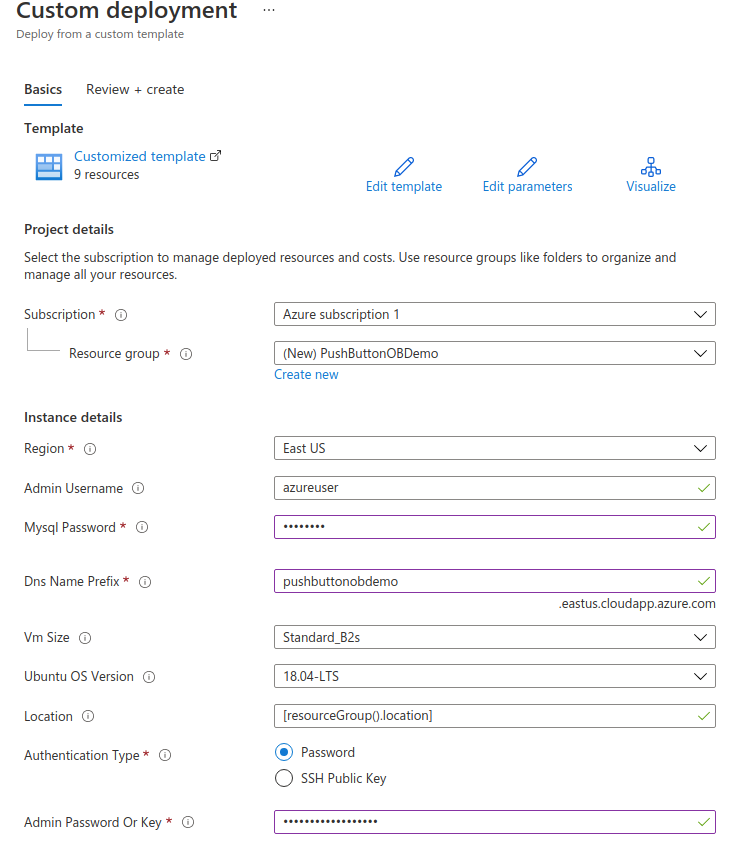
Once properties are filled in click on Review+create button. This will start validation of the config.
Once configuration is validated click on Create button.
That’s it! Deployment has started. You can see the progress of the deployment of the each Azure service that OB deployment uses.
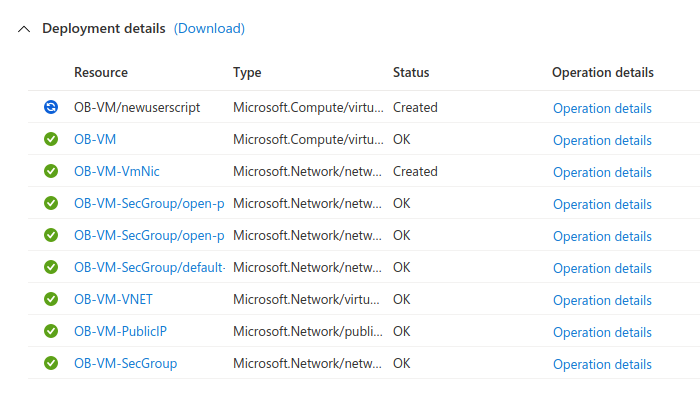
Even once all of the listed operations are finished, the database migrations have to finish running. It will take a few minutes.
Once migrations and thus deployment is done, OpenBoxes will be available at the public DNS configured in previous screen.
e.g. pushbuttonobdemo.eastus.cloudapp.azure.com/openboxes
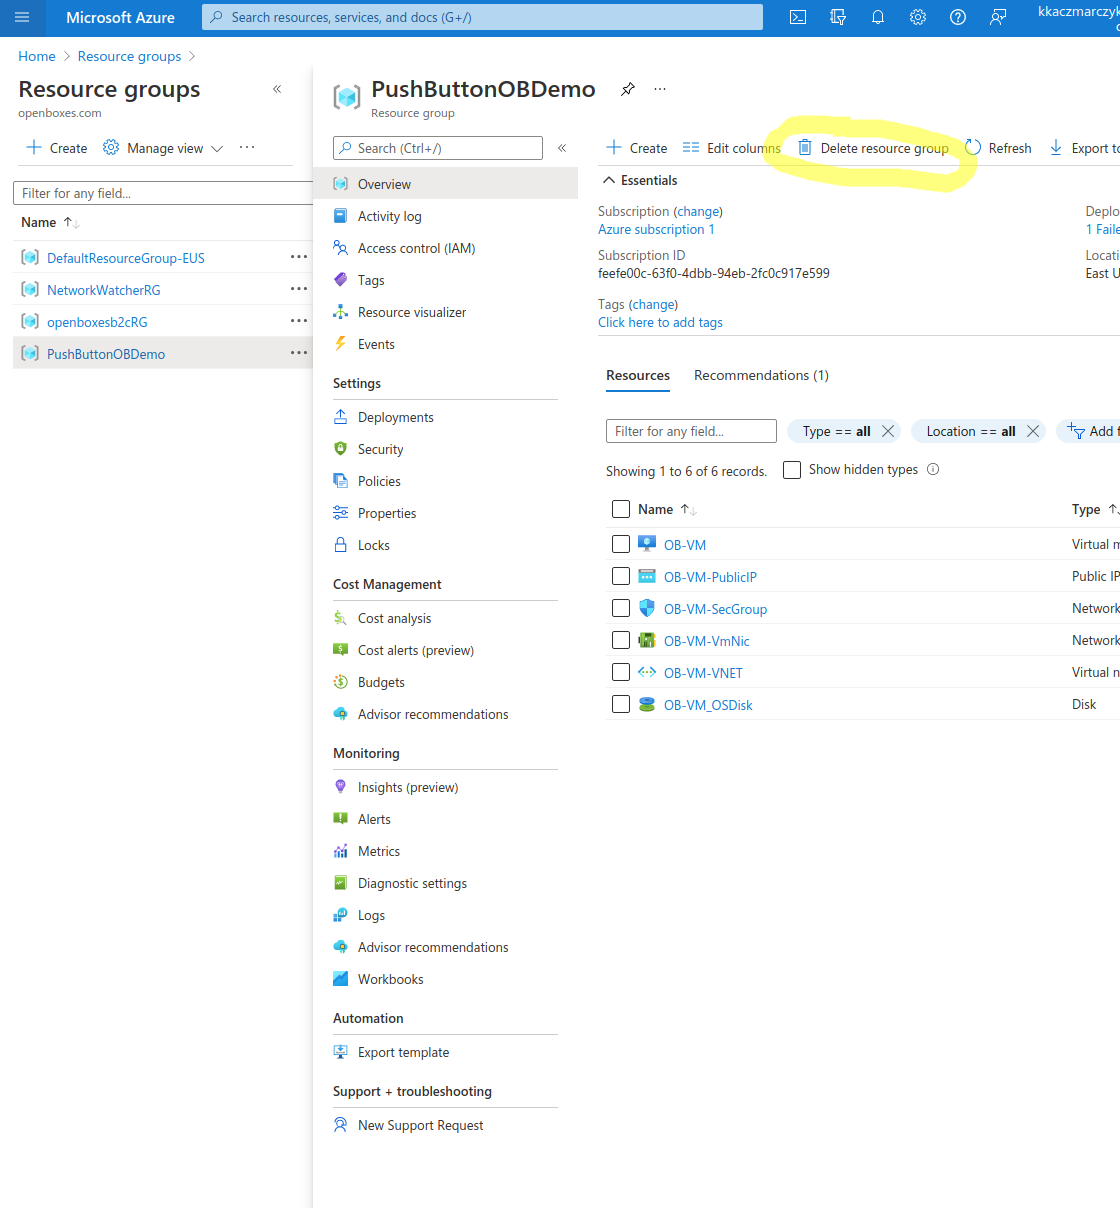
11. If you’d like to remove all of the resources created by the deployment you can delete each resource one-by-one or whole resource group containing these resources.
Go to the Resource Group page you’ve chosen during the setup. Click on Delete resource group, fill in the name of the resource group to confirm. It will take a few seconds for removal to take effect.